Help overview/Smart table
Smart table
Smart table is a tool of a specific unit / club for working with member data.
Smart table is for a clearer overview of member information in the unit / club.
Smart table is a tool of a specific unit / club. At the organization level there is a combined member overview and basic work with members, but it is not an organization-level Smart table.
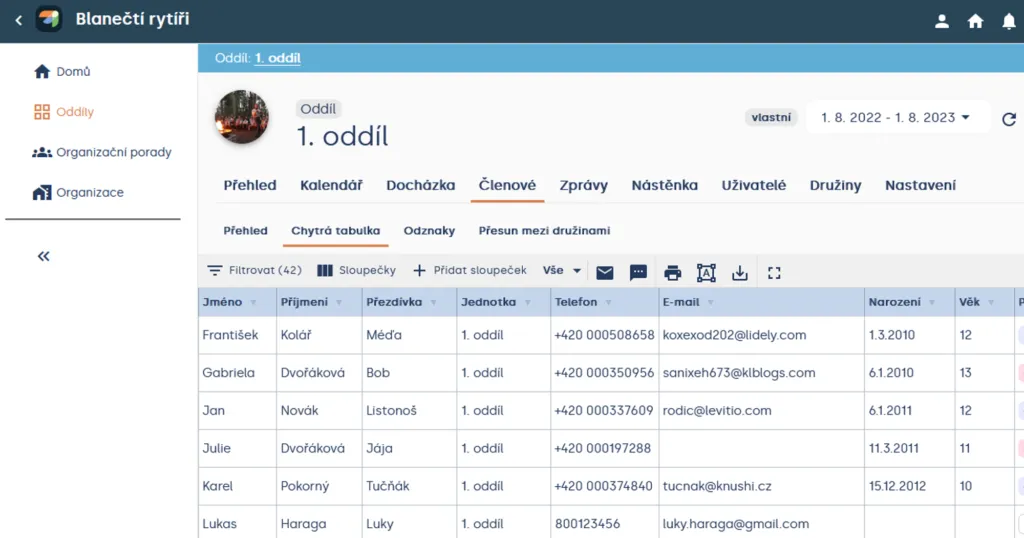
Unit > Members > Smart table
Here you can easily edit member information. Simply double-click the field with the information and you can rewrite it.
Heads up! After editing information for a member, confirm the edit with the enter key (↵), otherwise your edit won’t be saved.
By default, the table contains these columns:
- First name, last name, nickname
- Unit – cannot be edited in the smart table
- Phone, email – member contact information
- Date of birth
- Age – automatically calculated from date of birth taking days and months into account
- Gender
- Street, city, postal code, State, Country
- Mother: first name, last name, phone, email – mother’s contact information
- Father: first name, last name, phone, email – father’s contact information
Tip You only need one parent filled in. If both parents are filled in, messages will be sent to both parents.
None of this information is required. Basic columns cannot be deleted.
When you click on a column name, data can be sorted alphabetically – text (descending/ascending) and numbers are also sorted descending/ascending. Each column can be pinned and custom columns can be deleted.
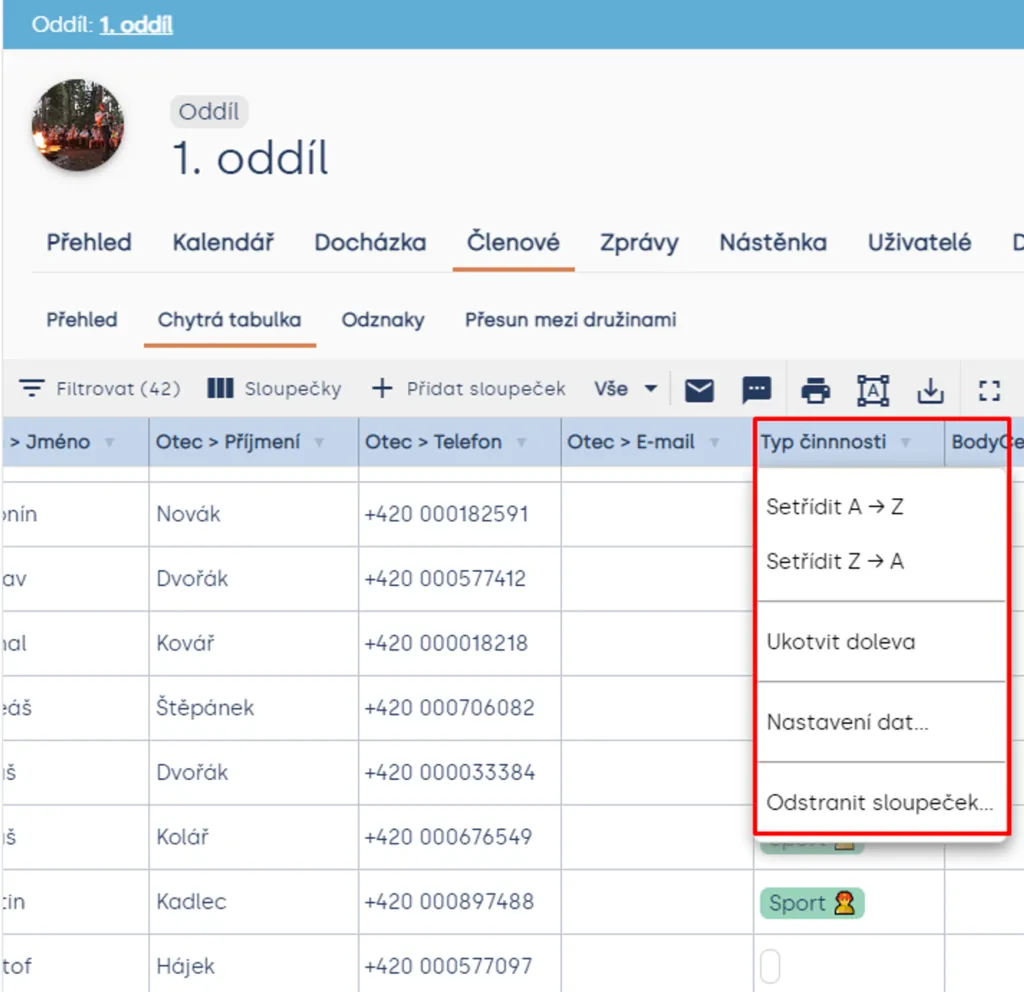
Smart table tools
The smart table contains many tools; most of them have their own pages. Here is a list of these tools (left to right):
- Filter – for sorting displayed data. More -here-
- Columns – for configuring data display in the table. More -here-
- Add column – for creating custom columns. More -here-
- Views – for making the smart table clearer. More -here-
- Send email/SMS message – for sending email/SMS messages to members. More -here-
- Print – prints the current smart table view.
- Print templates – Levitio graphic editor. More -here-
- Export – downloads the current smart table view to an Excel spreadsheet.
- Full screen view – expands the smart table across the entire screen.

View settings
For better clarity of the smart table, you can configure different smart table views here. Click the “Columns” tool and adjust which columns you want to display. When you click “Deselect all”, all columns are deselected and you can check which columns you want to display. Conversely, when you click “Select all”, all columns are selected and you can uncheck columns you don’t want to display.
If you can’t find a column, enter part of the column name (or the full name) in the search and Levitio will find it.
You can also change the order of columns in the smart table by grabbing the dots (⠿) next to a column name with the mouse and moving it before (above) or after (below) any column. This changes the column order.
You can also pin columns by clicking the anchor (⚓). Columns are always pinned from the first column on the left (from the top). This means if you pin the first column, the first three columns will be pinned.
Confirm the view with the “OK” button.
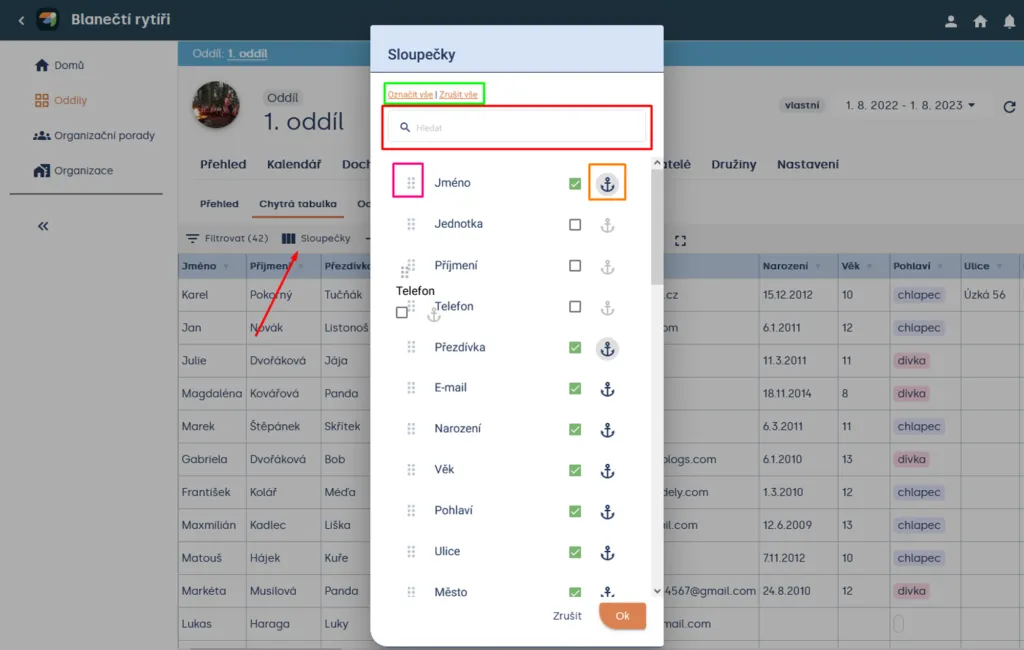
Unit > Members > Smart table “Columns”
You can save each view configuration as a new view. Simply name it and save it (by clicking save (💾). When you display a saved view, you can then rename it (you must always save the new name) or delete it (confirmation required). The “All” view displays all columns without filters.
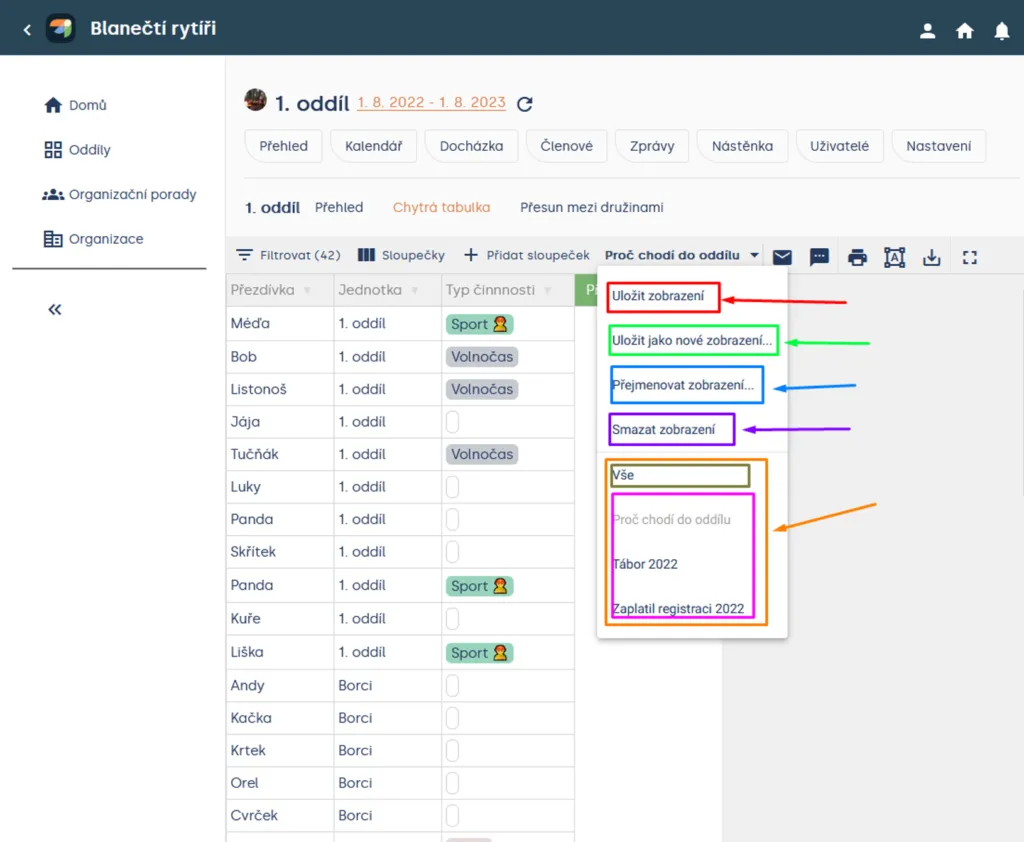
Unit > Members > Smart table “Views”
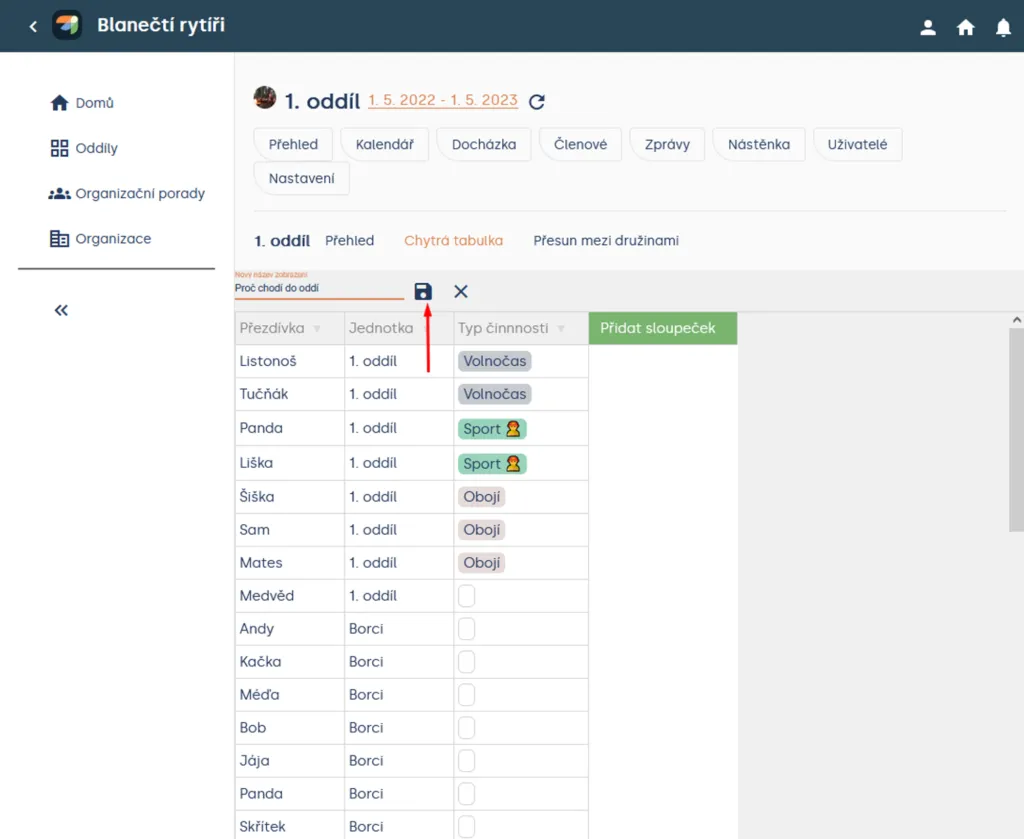
Unit > Members > Smart table “Views”
Filtering members
When you need to display information only about certain members who have something in common, use member filtering. After clicking “filter” in the smart table tools, filter settings will appear.
Each column has a configured data type (text, number, date…) according to which different conditions can be set for filtering members. First you must set which column you want to filter members by. Then choose from filtering options (whether it should equal (be the same), etc.) and then set the filter condition (what number it should equal, what text it should not contain…).
You can also combine filters (infinitely). You can also have the same filter multiple times with different conditions. Filter combinations can also be conditioned. The “and” condition between filters means the member must meet all specified filters. The “or” condition between filters means the member must meet at least one specified filter.
Confirm filtering with the “OK” button.
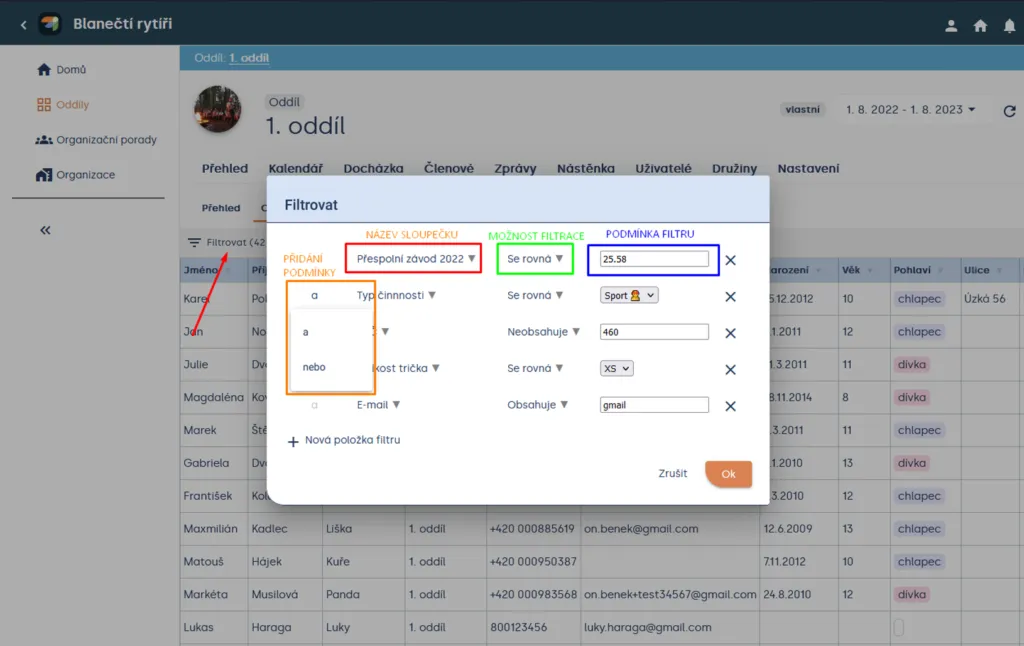
Unit > Members > Smart table “Filter”
Filter settings for different columns:
| COLUMN TYPE | FILTER OPTIONS | FILTER BY |
|---|---|---|
| Yes/no | Equals Does not equal | ✅ (yes) ❌ (no) |
| Choice from several options | Equals Does not equal | listed options |
| Number | Equals Does not equal Greater than Greater than or equal to Less than Less than or equal to | number is set |
| Date | Equals Does not equal Greater than Greater than or equal to Less than Less than or equal to | date selection |
| Text | Equals Does not equal Contains Does not contain Starts with Does not start with Ends with Does not end with | text field (enter text) |
| URL link | Equals Does not equal Contains Does not contain Starts with Does not start with Ends with Does not end with | text field (enter link) |
| File | CANNOT FILTER | upload file |
| Formula | CANNOT FILTER | Enter formula |
Tip You can save the filtered member view as a new view.
Related articles
Smart table
Custom columns
You can add custom columns to Smart table for data you need to record beyond the basic member profile.
Smart table
Bulk creation of pre-filled infection-free and health fitness forms
In Levitio you can easily generate required camp documents – even for all children at once, thanks to pre filling with dynamic fields.
Smart table
Bulk processing of camp leave requests with wage reimbursement in Levitio
In Levitio, you can easily generate the required documents for leave requests with wage reimbursement – even for all leaders at once , thanks to pre filling with dynamic fields.
Getting started
Getting started
Levitio is used by organizations, leaders, members, and parents. This guide walks you through creating an organization and the first steps.
For parents
Levitio for parents
Parent and member portal: events, payments, noticeboard, and children's details in one place. You enter the portal with a personal link, without registration or a password.